Quantcast
Channel: Codeception
Viewing all 321 articles
Browse latest View live

Codeception 2.0.1 and Changelog page

$
0
0

First bugfix release from the 2.0 version. This release introduces very important fix for running Codeception with PHP 5.4.x. Due to bug in PHP you would see strange errors while trying to execute Cept files. We can't say which exect PHP 5.4 versions were affected, but if you had issues running Codeception 2.0 earlier, please upgrade.

The next notable change is see method of WebDriver module. Now it checks for a visible text on a page. If you need to check if text is present inside HTML source of a page you can use newly added seeInPageSource method for that. Thanks artyfarty for this bugfix.

Update

redownload your codeception.phar for update:

php codecept.phar self-update

for composer version

$ php composer.phar update codeception/codeception

Changelog Page

From now on there will be no blogposts for minor releases. There is new changelog page which displays changes in latest releases. You should refer to it in order to follow the updates. Important changes, features, bugfixes will be mentioned there.


Unit Testing With Database

$
0
0

He-hey! You just opened this page to say that there is no such thing as unit testing with database. Unit tests are supposed to test isolated pieces, and sure unit tests should not touch the database. And we can agree with that. But it happened that "unit test" term is far more popular then "integration test". Unit test have one very strong requirement. Isolation. Complete isolation from other code units and services. In real world we can spoil our lives trying to achieve complete isolation. And even when with pain and sweat we finally got out models isolated from database, we receive a very strange class of tests. They do not provide a valuable feedback. Model test that does not connect to real database is useless, as it provide false positive results, and the code behind may crash connecting to real storage. So what do we want from unit test after all? To be written in complete isolation (what for?), or provide real feedback?

So let's not to concentrate on terms. Let's concentrate on testing.

Testing Faster With Transactions

What drawbacks we receive if unit tests are connecting to database? Sure it will be dramatic slowdown. We will need to connect to database, insert data, and perform a cleanup afterwards. The most simple way of cleaning things up is to repopulate database completely. Yet, this is the slowest way. But there is a much better way of doing things. Especially for unit (and functional) tests. We can use transactions.

That's right. We can cover a test into transaction, and rollback it after the test is finished. This is the fastest and the most stable way of working with database in unit tests. The only issue with it is that not all databases support nested transactions. For instance, in MySQL you can't begin transaction and begin next transaction as there can be only one at one point. Yet, those nested transactions can be emulated. And here are good news: if you use one of popular PHP Frameworks: Laravel, Yii2, Phalcon, or Doctrine ORM, your framework already can do that! Thus, in unit test you can begin transaction in setup, and finish it in teardown of a test. Sure, you should use the framework's database layer for that.

In Codeception we already use this feature for speeding up functional tests. But it was not that obvious that you can use the same practice for unit tests.

Let's connect our framework to the unit.suite.yml. In current example we will use Laravel, yet very similar steps can be done for Yii2, Phalcon, and Symfony+Doctrine.

# Codeception Test Suite Configuration

# suite for unit (internal) tests.
class_name: UnitTester
modules:
    enabled: [Laravel4, UnitHelper, Asserts]

That's all. This line of Laravel module will start the transaction before each test in suite.

Using ActiveRecord Helpers

Laravel, Phalcon, and Yii are frameworks that use ActiveRecord pattern for working with database. Codeception Framework modules have built-in helpers, which share the standard interface to work with database records.

Let's write a sample Laravel test which demonstrates usage of Codeception helpers. In this example we will test activate method of User model. It activates user when provided activation key matches predefined one.

<?php
class UserTest extends \Codeception\TestCase\Test
{
    /**
     * @var UnitTester
     */
    protected $tester;

    protected $user_id;

    function _before()
    {
        // preparing a user, inserting user record to database
        $this->user_id = $this->tester->haveRecord('users', [
            'username' => 'John',
            'email' => 'john@snow.com',
            'activation_key' => '123456',
            'is_active' => 0

        ]);
    }

    function testUserCanBeActivatedWithValidKey()
    {
        // lookup for user with Eloquent API
        $user = User::find($this->user_id);
        // executing action
        $isActivated = $user->activate('123456'));
        // performing assertion
        $this->assertTrue($isActivated);
        // checking that data was actually saved into database
        $this->tester->seeRecord('users', [
            'id' => $this->user_id,
            'is_active' => 1
         ]);
    }

    function testUserNotActivatedWithInvalidKey()
    {
        $user = User::find($this->user_id);
        $this->assertFalse($user->activate('00000'));
        $this->tester->dontSeeRecord('users', [
            'id' => $this->user_id,
            'is_active' => 1
         ]);
    }
}
?>

As it was mentioned, similar test can be written for other mentioned frameworks. Depending on framework API ActiveRecord helper methods

  • grabRecord
  • seeRecord
  • haveRecord
  • doneSeeRecord

may take table name (Laravel) or model name (Phalcon, Yii2).

Who is that Tester?

$this->tester object used here is instance of Actor class and contain all methods of modules and helpers used in unit suite. It would be a good idea to put any shared code into helpers, and reuse across test cases by accessing $this->tester. This object is injected into any testcase that extends Codeception\TestCase\Test.

Conclusion

Sure, we could implement similar test using just Eloquent API without using Codeception helpers. Still, they are quite useful. Especially assertion methods like seeRecord which queries database for a record with given attributes.

Codeception Updates

$
0
0

Codeception is improving from day to day with the help of our contributors. Recently we had new 2.0.6 release with lots of bugfixes and new features. Unfortunately some not obvious regressions were introduced, and we had to release 2.0.7 as fast as we could.

In order to maintain a predictable release cycle we plan to release a new bugfix version each month and deliver a new major version each 6 months. We tend to follow this plan for future, yet we are not ready to follow it strictly.

Today we have a few more announcements to sum up all recent work on Codeception and its support projects.

CodeCoverage

Latest updates to c3 brought full compatibility with Codeception 2.0. Also c3 can be installed and updated via Composer.

"require-dev": {
    "codeception/c3": "2.*"
},
"scripts": {
    "post-install-cmd": [
        "Codeception\\c3\\Installer::copyC3ToRoot"
    ],
    "post-update-cmd": [
        "Codeception\\c3\\Installer::copyC3ToRoot"
    ]
}

This allows to follow updates of code coverage collector (c3) easily. Also please note, that c3 issues were moved to main Codeception repo.

AspectMock

AspectMock was recently updated to version 0.5.0. Latest update is powered by Go Aop framework version 0.5. In new AspectMock fixed passing parameters by reference, and added ability to mock PHP functions.

AspectMock allows to replace PHP function in desired namespace with user-defined closure or a return single return value. For instance, you can stub file operations by mocking file_get_contents or file_put_contents. You can also mock time functions, in order to make tests stable to time changes.

<?php
namespace App\Cache;

$func = test::func('App\Cache', 'file_put_contents');
$cache = new FileCache;
$cache->store('hello'); // calls file_put_contents
$func->verifyInvoked(); // verifies file_put_content was called
test::cleanup(); // restore original function
?>

Same can be done for time functions:

<?php
namespace demo;
test::func('demo', 'time', 'now');
$this->assertEquals('now', time());
?>

You can install latest AspectMock via Composer:

composer require "codeception/aspect-mock:~0.5"

Codeception 2.1

Next major release of Codeception will include new features, breaking changes, with ability to keep backwards compatibility. Here are the most interesting features you should wait for:

  • All support classes like actors, steps, pages, etc, will be moved to tests/_support directory.
  • Support classes will use PSR-4 standard.
  • Dependency Injection. All support and test classes can be included one into another: Pages can be injected into Helpers, Helpers can be injected into Cest classes, etc.
  • Module Conflicts. Lots of issues are happening when users try ot include modules with same apis into one suite. Like PhpBrowser + Laravel4 + WebDriver. Those module is possible to be used together, but possibly that was not really intended to be used this way. Call to $I->amOnPage may be executed by any provided modules depending on the order of their declaration. This leads to unpredictable errors, and is the source of confusion. In 2.1 Codeception will allow to define module conflicts, and throw exceptions if modules are not expected to be used together.
  • ...and more

Global Installation

One of recently discussed topics for Codeception, was global installation of Codeception. From now on you can install Codeception globally using Composer:

composer global require 'codeception/codeception=2.0.*'

This will be recommended installation method since Codeception 2.1.

RoboCI

This project that desires its own post in this blog. It is open-source reproduction of Travis CI using Docker and Travis Cookbooks. RoboCI can be use to execute Travis CI tests locally or on remote server. It does not require VirtualBox nor Vagrant installed. It was executed with Codeception internal tests, with Selenium + Firefox, MySQL, PostgreSQL, MongoDb, and other services. You can read more about RoboCI and try it in your projects. In future we plan to provide consulting services on using RoboCI with Codeception or any other PHP testing framework. Stay in touch for updates!

Managing Data with FactoryMuffin

$
0
0

One of the greatest things of testing Ruby on Rails applications was usage of Factories, managed by FactoryGirl. It changed the way the test data was managed in test. Instead of defining fixtures one by one, in a single .yml configuration, it allowed to generate required models per test. This concept is very convenient, however it is not widespread in PHP world. Probably, this was because, there is no single ORM in PHP, like ActiveRecord is for Ruby. We have Doctrine, Eloquent, and each major framework has its own ORM layer, so that we it is pretty hard to deal with models of those frameworks in one manner.

But it looks like factories finally came to PHP! The League of Extraordinary Packages produced a great package, self-claimed as factory_girl for PHP. Meet Factory Muffin. It allows simple generation of database records for integration and functional testing. Let's see how it can be used with Codeception.

Setup in Codeception

At first lets add league/factory-muffin": "~2.0 to composer.json:

"require-dev": {
    "codeception/codeception": "~2.0",
    "league/factory-muffin": "~2.0"
}

Then we execute composer install.

Loading composer repositories with package information
Updating dependencies (including require-dev)
  - Installing fzaninotto/faker (v1.4.0)
    Downloading: 100%         

  - Installing league/factory-muffin (v2.1.1)
    Downloading: 100%         

Writing lock file
Generating autoload files
Generating optimized class loader

As you may noticed, FactoryMuffin uses awesome Faker library for generating random data for models.

For using factories inside tests we will create FactoryHelper:

php vendor/bin/codecept g:helper Factory
Helper /home/davert/project/tests/_support/FactoryHelper.php created

We will define factories in the _initialize method of FactoryHelper. Let's say we have two models, Post and User in application. This is how we specify rules for generating new objects of these models.

<?php
class FactoryHelper extends \Codeception\Module
{
    /**
     * @var \League\FactoryMuffin\Factory
     */
    protected $factory;
    
    public function _initialize()
    {
        $this->factory = new \League\FactoryMuffin\Factory;
        $this->factory->define('Post', array(
            'title'    => 'sentence|5', // title with random 5 words
            'body'   => 'text', // random text
        ));

        $this->factory->define('User', array(
            'email' => 'unique:email', // random unique email
        ));
    }
}
?>

This is how generation of Post and User is defined. From the box, Muffin is designed to work with ActiveRecord models, and with Eloquent in particular. So you can use it in Yii, Phalcon, yet we will demonstrate its usage in Laravel application. FactoryMuffin can also be customized to work with Doctrine as well.

Using Factories in Laravel

To use FactoryMuffin in Laravel functional tests we need to create additional methods in FactoryHelper for generating and saving records: havePosts and haveUsers methods. They will populate database with number of records specified. We will need to clean up those records at the end of a test.

<?php
class FactoryHelper extends \Codeception\Module
{
    /**
     * @var \League\FactoryMuffin\Factory
     */
    protected $factory;
    
    public function _initialize()
    {
        $this->factory = new \League\FactoryMuffin\Factory;
        $this->factory->define('Post', array(
            'title'    => 'sentence|5', // title with random 5 words
            'body'   => 'text', // random text
        ));

        $this->factory->define('User', array(
            'email' => 'unique:email', // random unique email
        ));
    }

    public function havePosts($num)
    {
        $this->factory->seed($num, 'Post');
    }

    public function haveUsers($num)
    {
        $this->factory->seed($num, 'Post');
    }

    public function _after(\Codeception\TestCase $test)
    {
        // actually this is not needed
        // if you use cleanup: true option 
        // in Laravel4 module
        $this->factory->deleteSaved();
    }
}
?>

By including FactoryHelper to the functional suite config, we can use it inside the actor ($I) object.

This allows us to test features like pagination. For instance, we can check that only 20 posts are listed on a page:

<?php
$I = new FunctionalTester($scenario);
$I->wantTo('check that only 20 posts are listed');
$I->havePosts(40);
$I->amOnPage('/posts');
$I->seeNumberOfElements('.post', 20);
?>

Source code of this example is on GitHub.

Factories in Unit Tests

Factories can also be used in unit testing. Let's say user can create posts, and in order to optimize queries we are saving number of user posts in num_posts column of users table. We are going to test that this column is updated each time a new post by user is created.

We will need one more method added into FactoryHelper class:

<?php
public function produce($model, $attributes = array())
{
    return $this->factory->create($model, $attributes);
}
?>

After we include FactoryHelper into unit suite we can use its methods in tests:

<?php
class UserTest extends \Codeception\TestCase\Test
{
    /**
     * @var UnitTester
     */
    protected $tester;

    function testCounterCache()
    {
        $user = $this->tester->produce('User');
        $this->assertEquals(0, $user->num_posts);

        $this->tester->produce('Post', ['user_id' => $user->id]);
        $this->assertEquals(1, User::find($user->id)->num_posts);

        $this->tester->produce('Post', ['user_id' => $user->id]);
        $this->assertEquals(2, User::find($user->id)->num_posts);
    }
}
?>

Conclusion

As you see, factories make your tests clean and expressive. Forget about managing test data manually, forget about fixtures. Use FactoryMuffin.

Update FactoryHelper for Symfony2 and Doctrine modules

Acceptance Testing With No Selenium or PhantomJS Installed

$
0
0

Selenium PhantomJS

This post summarizes some recent work that was done for creating portable testing environments. The idea was to reduce dependencies required by acceptance testing. As you know, testing of web pages require Selenium or PhanromJS servers, which allow to interact with web page, and execute user scripts on page. However, installing those dependencies, can be a pain. Especially Selenium. If you are not running it inside desktop environment you probably need to have Firefox or Chromium, and they can't be run without virtual framebuffer, as they have some display server to run on. Setting up those packages can take liters of sweat and bunch of nerves.

That's why we decided to pack Selenium and PhantomJS into portable Docker containers. Did you hear about Docker? If not - you probably should take some time to look at it. Docker allows you to create virtual environments on Linux hosts without real virtualization. Docker creates an isolated environment inside the host machine without recreating operating system.

Docker containers are lightweight and easy to use. If you have Linux. Probably all your servers use Linux, so you might find docker images of Selenium and PhantomJS pretty useful!

SeleniumEnv: Selenium, Xvfb, Firefox, and Chromium Inside Container

OK, lets assume you are using Linux and Docker >=1.2. From now on running Selenium won't take from you anything more then running those commands:

docker run -i -t -p 4444:4444 davert/selenium-env

This will start virtual display server (Xvfb) and Selenium inside a container. Please note, you don't need anything of those installed on your host. Not even Java, required to run Selenium. Only Docker is needed and you can run Selenium in one line!

By running this command you will see this output:

Running Selenium Env: Selenium Server, and Xvfb with Firefox and Chromium
Host IP: 172.17.42.1
[dix] Could not init font path element /usr/share/fonts/X11/cyrillic, removing from list!
[dix] Could not init font path element /usr/share/fonts/X11/100dpi/:unscaled, removing from list!
[dix] Could not init font path element /usr/share/fonts/X11/75dpi/:unscaled, removing from list!
[dix] Could not init font path element /usr/share/fonts/X11/Type1, removing from list!
[dix] Could not init font path element /usr/share/fonts/X11/100dpi, removing from list!
[dix] Could not init font path element /usr/share/fonts/X11/75dpi, removing from list!
[dix] Could not init font path element /var/lib/defoma/x-ttcidfont-conf.d/dirs/TrueType, removing from list!
02:02:30.641 INFO - Launching a standalone server
02:02:30.670 INFO - Java: Oracle Corporation 24.60-b09
02:02:30.670 INFO - OS: Linux 3.16.0-24-generic amd64
02:02:30.684 INFO - v2.44.0, with Core v2.44.0. Built from revision 76d78cf
02:02:30.735 INFO - Default driver org.openqa.selenium.ie.InternetExplorerDriver registration is skipped: registration capabilities Capabilities [{platform=WINDOWS, ensureCleanSession=true, browserName=internet explorer, version=}] does not match with current platform: LINUX
02:02:30.790 INFO - RemoteWebDriver instances should connect to: http://127.0.0.1:4444/wd/hub
02:02:30.791 INFO - Version Jetty/5.1.x
02:02:30.792 INFO - Started HttpContext[/selenium-server/driver,/selenium-server/driver]
02:02:30.792 INFO - Started HttpContext[/selenium-server,/selenium-server]
02:02:30.793 INFO - Started HttpContext[/,/]
02:02:30.806 INFO - Started org.openqa.jetty.jetty.servlet.ServletHandler@1a966bcb
02:02:30.807 INFO - Started HttpContext[/wd,/wd]
02:02:30.809 INFO - Started SocketListener on 0.0.0.0:4444
02:02:30.809 INFO - Started org.openqa.jetty.jetty.Server@2b6ea258

By specifying -p 4444:4444 option in docker run we mapped container's port 4444, which is default for Selenium to the same port on our host machine. So, any process can connect to Selenium on its standard port, even Selenium is completely isolated from other processes.

And here comes a tricky question. If Selenium is completely isolated, how can we test applications running on a local web server? We have a solution for that. If your application is served by nginx or any other web server, you can probably access it by hostname (other than localhost). What we can do is to pass hostname inside a container.

docker run -i -t -p 4444:4444 -e APP_HOST=myhost davert/selenium-env

This will bind myhost to your host machine IP. So, container, and Firefox, Chromium, can get access to your local web site from inside container.

Similar idea is used for application executed on specific port. If you use PHP built-in server, you can start it at specific port, and pass it into container as well. Please note, that to make server accessible from container, it should be started on 0.0.0.0 IP:

php -S 0.0.0.0:8000
# in new terminal window
docker run -i -t -p 4444:4444 -e APP_PORT=8000 davert/selenium-env 
# in new terminal window
codecept run acceptance

PhantomJsEnv: PhantomJS Inside Container

Instructions are the same for running PhantomJS. It can be started with

docker run -i -t -p 4444:4444 davert/phantomjs-env

Everything else is pretty similar. Also you can easily switch from Selenium to PhantomJS by starting or stopping those two containers. Isn't that useful?

Images and Source Code

SeleniumEnv and PhantomJsEnv are created from Travis CI Cookbooks and packed into containers. They are free to use and free to modify for custom needs.

If you need to have Selenium Server from version other than 2.44.0 (which is latest for today), you should update Docker file and build an image from it.

SeleniumEnv and PhantomJsEnv may simplify testing for all Linux users. They will definitely simplify setting up Continuous Integration servers. You can even recreate a complete testing environment inside a container. Take a look into RoboCI project for this. It allows you to build Travis CI-like service on your own host!

Use them and enjoy :)

P.S. Feedback, Pull Requests, and Issues, are welcome )

Setting up Jenkins with Codeception

$
0
0

Jenkins

A frequent question that appear from time to time is How to set up Codeception with Jenkins. Despite the growth of popularity of various Continuous Integration solutions Jenkins is still the most popular open-source solution on market. It is easy to setup and is easy to customize by applying various 3rd-party plugins. In this post we will take a look on how to setup testing process of PHP project with Jenkins CI and Codeception.

Create new job in Jenkins

Preparing Jenkins

We will start from an empty Jenkins Server executed on localhost. Let's create a new Job for project tested with Codeception and name it PHPCodeceptionProject. Before we proceed to configuring it, lets install required plugins:

  • Git Plugin - for building tests for Git repo
  • Green Balls - to display success results in green.
  • xUnit Plugin, jUnit Plugin - to process and display Codeception XML reports
  • HTML Publisher Plugin - to process Codeception HTML reports
  • AnsiColor - to show colorized console output.

Jenkins Plugins

Basic Setup

Once everything is installed lets get back to configuring our newly created PHPCodeceptionProject. At first we will set up Git to checkout code and build. Depending on your needs you can set up periodical build or trigger build once the change is pushed to GitHub (you will need GitHub plugin for that). You may also set up Jenkins as alternative to Travis CI to build your pull requests with GitHub pull request builder plugin.

We will enable colors in console using Ansi Color

Jenkins ANSI color

Next and the most important part is to define build step. We won't create any sofisticated environment settings like setting up database and services. We assume that all we need to execute tests is to inctall composer dependencies and run codeception tests:

composer install
./vendor/bin/codecept run

Jenkins Codeception Build Step

And that's the absolute minimum we need to execute tests in Jenkins. We can save project and execute the job. Jenkins will clone repository from Git, install composer dependencies and run Codeception tests. If tests fail you can review the console output to discover what went wrong.

Jenkins Console Output

XML Reports

But we don't want to analyze console output for each failing build. Especially If Jenkins can collect and display the results inside its web UI. Codeception can export its results using JUnit XML format. To generate XML report on each build we will need to append --xml option to Codeception execution command. Codeception will print result.xml file containing information about test status with steps and stack traces for failing tests. Unfortunately Jenkins can't process such special like Codeception steps. So we will need to configure to print data only which strictly applies to xUnit xml format. This should be done in codeception.yml

settings:
    strict_xml: true

Now let's update our build step to generate xml:

composer install
./vendor/bin/codecept run --xml

and ask Jenkins to collect resulted XML. This can be done as part of Post-build actions. Let's add Publish xUnit test result report action and configure it to use with PHPUnit reports.

Use PHPUnit xUnit builder for Jenkins

Now we should specify path to PHPUnit style XML reports. In case of standard Codeception setup we should specify tests/_output/*.xml as a pattern for matching resulted XMLs. Now we save the project and rebuild it.

Jenkins Result Trend

Now for all builds we will see results trend graph that shows us percentage of passing and failing tests. We also will see a Latest Test Result link which will lead to to the page where all executed tests and their stats listed in a table.

HTML Reports

To get more details on steps executed you can ask Codeception to generate HTML report. Jenkins can display them as well.

composer install
./vendor/bin/codecept run --html

Now we need HTML Publisher plugin configured to display generated HTML files. It should be added as post-build action similar way we did it for XML reports.

Jenkins Codeception HTML Setup

Jenkins should locate report.html located at tests/_output/. Now Jenkins will display HTML reports for each build.

Jenkins HTML Report Jenkins Codeception HTML Results

That's pretty much everything you need to get a simple Jenkins setup with Codeception.

Codeception 2.1 Beta

$
0
0

We are glad to announce the first release of Codeception 2.1. It was a long time of developing the next major version of our testing framework. We delayed the release many times trying to bring as many cool features as we could. Today we can say that master branch is stabilized and we are prepared to share results of our work with you. Codeception 2.1 tries to do its best in test codebase organizing, improving ux, and customization.

Take a look what is landed in Codeception 2.1.

Full list of features is available in changelog. Documentation was updated accordingly.

You can install Codeception 2.1 via composer by requiring 2.1.0-beta version, or by downloading phar.

Give new Codeception a try and send us feedback. As always use GitHub issues for that. Thanks for being with us all that time! We hope you will love this release.

Stable 2.1.0 is expected by the middle-end of May

Upgrade Notes

  • If you are upgrading from Codeception 2.0 delete actor classes in tests/acceptance, tests/functional, etc, and rebuild actor classes. They will be recreated in tests/_support.
  • Try to execute new tests. If there are unmet dependencies, or module conflicts, you will be notified by exception with an advice how to resolve it.
  • It is recommended to recreate Helpers per suite with g:helper generator, like codecept g:helper Acceptance. New helpers will be store in tests/_support/Helper.
  • Same for PageObjects and StepObjects, they should be moved to _support.

Codeception 2.1 RC

$
0
0

Today we are announcing Codeception 2.1 RC release. We are almost ready to release a stable version, however we'd like to receive more feedback before the actual launch. We encourage you to install the latest 2.1 release and try it on your projects. Migrations should be painless if you follow the upgrade instructions. Here are the things you should keep in mind while upgrading:

  • REST, SOAP and Doctrine2 modules rely on another module which should be explicitly set via depends config param. For instance, you should pass Laravel5 module if you do API testing with REST module
modules:
    enabled: [REST, Laravel5]
    config:
        REST:
            depends: Laravel5
  • Actor classes are moved to _support directory. Please delete all previously generated actor classes which reside in suites directories. New AcceptanceTester, FunctionalTester, UnitTester classes are expected to be extended with custom methods.
  • Modules that share similar interfaces like WebDriver, PhpBrowser, and framework modules won't run together. You should avoid enabling more than one of those modules in suite config to avoid confusion. If you enable Laravel5 and WebDriver and execute $I->amOnPage('/') you can't be sure how this command is exected - will it open a browser window using WebDriver protocol, or it will be handled by Laravel framework directly.
  • Cept files should avoid setting their metadata via $scenario methods. Instead of calling $scenario->skip(), $scenario->group('firefox'), etc, it is recommended to set scenario settings with annotations // @skip, // @group firefox. With this change you can now skip tests based on a condition: if (substr(PHP_OS, 0, 3) == 'Win') $scenario->skip().
  • Kohana, Symfony1, Doctrine1 modules were removed and they reside in separate repositories in Codeception organization on GitHub.

That should be enough to have everything upgraded. We already prepared updated guides (they didn't change from 2.1.0-beta). Please try new Codeception and tell us your opinion in comments or on GitHub.

Codeception 2.1 can be used with latest Guzzle 6 (as well as previous Guzzle releases). That's the most important change since the beta version. See the changelog for more info. We are preparing site updates and demo apps to reflect new changes. Stay tuned!

Download 2.1.0-rc phar

via composer.json:

"codeception/codeception": "2.1.0-rc1"

Codeception 2.1 Is Here

$
0
0

We are finally ready to show you the Codeception 2.1. Since RC we stabilized its codebase, and we encourage you to start all your new projects with Codeception 2.1. As well as migrate old ones. Codeception 2.1 is aimed for consistency and provide you the better experience for testing your web applications. This new release makes tests even more simple to read, write, and maintain.

If you didn't track for the changes in master we will list all the new features here:

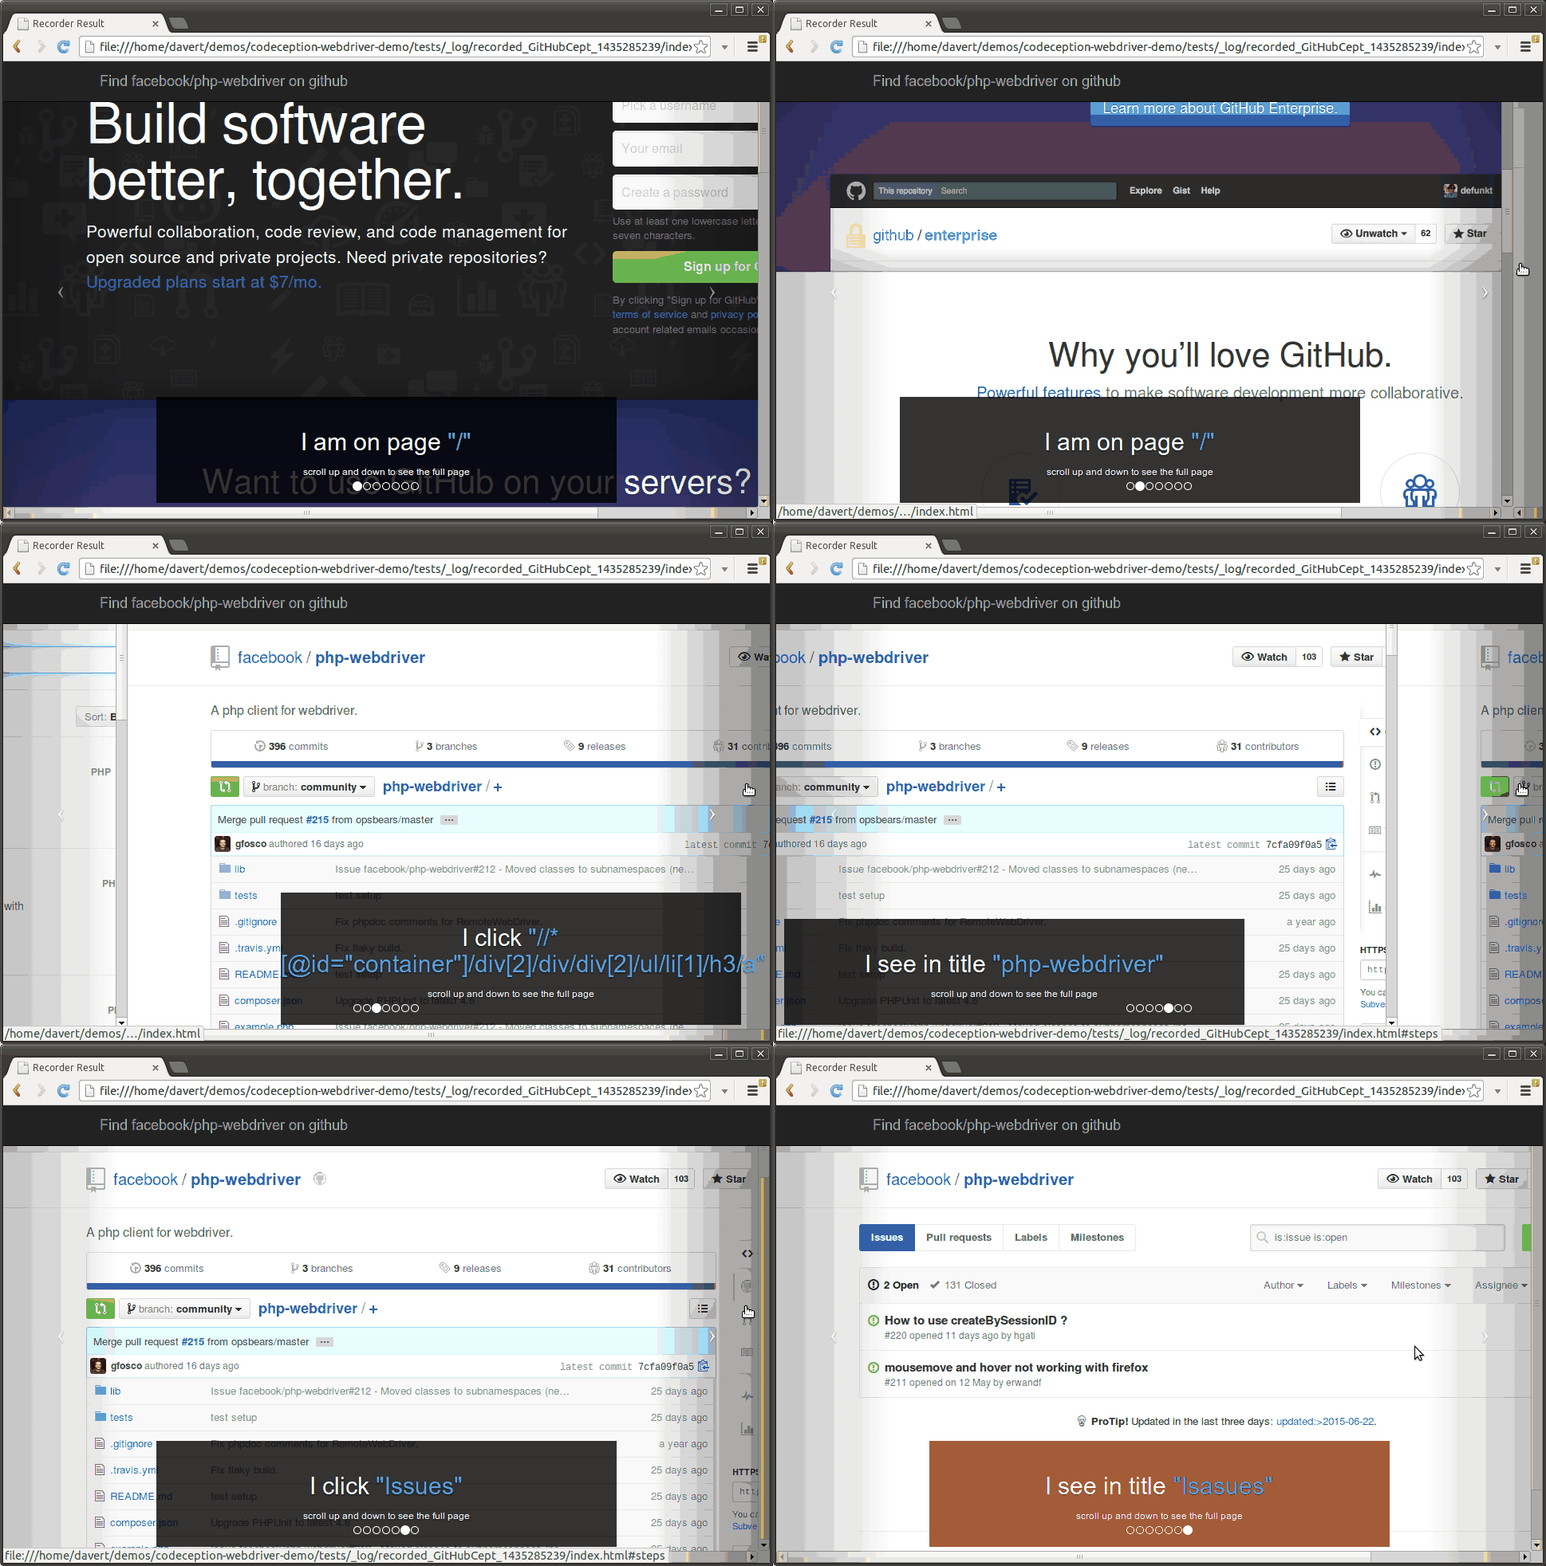
  • We added Recorder extension, which is probably the most fancy feature you may try. Using it you can record test execution history by saving a screenshot of each step. This is handy for running tests on CI, debugging tests executed via PhantomJS or showing nice reports to your boss.

recorder

  • Updated to Guzzle 6. Codeception can now work both with Guzzle v5 and Guzzle v6. PhpBrowser chooses right connector depending on Guzzle version installed.
  • PSR-4: all support classes moved to tests/_support by default. Actors, Helpers, PageObjects, StepObjects, GroupObjects to follow PSR-4 naming style. New AcceptanceTester, FunctionalTester, UnitTester classes are expected to be extended with custom methods. For instance, you can define some common behaviors there. For instance, it is a good idea to place login method into the actor class:
<?php
class AcceptanceTester extends \Codeception\Actor
{
    use _generated\AcceptanceTesterActions;

    public function login()
    {
       $this->amOnPage('/login');
       $this->fillField('name', 'jon');
       $this->fillField('password', '123345');
       $this->click('Login');
    }
}
?>
  • Dependency Injection: support classes can be injected into tests. Support classes can be injected into each other too.
<?php
class UserCest 
{
  // inject page objects into Cests
  function updatePassword(\Page\User $page, AcceptanceTester $I)
  {
      $page->openProfile();
      $page->editProfile();
      $I->fillField($page->oldPasswordField, '123456');
      $I->fillField($page->newPasswordField, '654321');
      $I->fillField($page->passwordFieldRepeat, '654321');
      $I->click($page->saveBtn);
      $I->see('Password has been updated');
  }

  // inject step object into Cest
  function adminUpdatePassword(\Step\Admin $I)
  {
      $I->enterAdminArea();
      $I->changePassword('654321');
      $I->see('Password has been updated');
  }
}
?>
  • Module config simplified: Modules can be configured in enabled section of suite config. Take a look of this sample declaration of Api suite, there is no config section inside modules.
modules:
    enabled:
        - WebDriver:
            url: http://codeception.com
            browser: firefox
        - \Helper\Acceptance
  • Dependencies: module can explicitly define dependencies and expect their injection. REST, SOAP and Doctrine2 modules rely on another module which should be explicitly set via depends config param.
class_name: ApiTester
modules:
    enabled:
        - REST:
            url: https://api.github.com/
            depends: PhpBrowser           
        - \Helper\Api

As you can see, you don't need to specify PhpBrowser in enabled section, you can set it only via depends.

  • Conflicts: module can define conflicts with each other. Modules that share similar interfaces like WebDriver, PhpBrowser, and framework modules won't run together. You should avoid enabling more than one of those modules in suite config to avoid confusion. If you enable Laravel5 and WebDriver and execute $I->amOnPage('/') you can't be sure how this command is exected - will it open a browser window using WebDriver protocol, or it will be handled by Laravel framework directly.

  • Current modules, environment, and test name can be received in scenario.

<?php
$scenario->current('name'); // returns current test name
$scenario->current('modules'); // returns current modules
$scenario->current('env'); // returns environment

// can be used like this
if ($scenario->current('env') == 'firefox') {
  // do something for firefox only
}
// naming screenshot
$I->makeScreenshot($scenario->current('name').'_screenshot.png');
?>
  • Environment Matrix: You can run tests combining several environments by separating their names by comma:
codecept run --env dev,phantom --env dev,chrome --env dev,firefox

Environments can now be stored in separate configuration files in tests/_envs dir created with generate:environment command:

tests/_envs
|── chrome.yml
|── phantom.yml
|── firefox.yml
|── dev.yml
  • Cept files should avoid setting their metadata via $scenario methods. Instead of calling $scenario->skip(), $scenario->group('firefox'), etc, it is recommended to set scenario settings with annotations // @skip, // @group firefox. However, you can use $scenario->skip whenever you need to do it on some condition, like
<?php
if (substr(PHP_OS, 0, 3) == 'Win') $scenario->skip()
?>
  • Improved HTML reports html report

  • Modules can be partially loaded. If you need only some actions to be included into tester objects. For instance, you want to have REST API tests with Laravel5 module. In this case you probably don't want methods from Laravel module like amOnPage or see to be included into the ApiTester as they interact with HTML pages, which we are not supposed to use. But you still need Laravel ORM methods like seeRecord to verify that changes were saved to database. In this case you can enable only ORM methods of Laravel5 module.

modules:
    enabled: 
        - Laravel5:
            part: ORM
        - REST:
            part: Json
            depends: Laravel5

As for REST module you can load methods only for API format you are using. You can choose either XML or Json, so only methods for Json or XML will be loaded.

  • Whenever you have steps grouped inside actor class, pageobject, or stepobject, you can the step executed with its substeps in console or HTML report. html report
  • RunFailed extension is enabled by default for all new projects. It means that you can rerun your failed tests by executing codecept run -g failed when this extension is enabled.

And lots of other notable improvements which you can see in changelog.

Starting from Codeception 2.1 we recommend using Cest as a default format for all scenario-driven acceptance and functional, or api tests. Guides were rewritten to reflect new improved approaches to testing that you should practice by using Codeception.

Upgrading

  • It is pretty easy to upgrade from 2.0. The only thing you should start with is to rebuild your actor classes by running codecept build command. The old actor classes (*Tester or *Guy) in suite directories should be deleted manually.
  • REST, SOAP, Doctrine2 module will need to be configured to use a dependent module as it was shown above. You will get a detailed exception with configuration example once you execute tests with those modules.
  • Helpers, PageObjects, StepObjects are expected to follow PSR-4 standard and use namespaces. It is recommended to rename classes to replace suffixes with namespaces, like UserPage => Page\User. However, those changes are not required, so you can keep your support objects without changes.

If you are using 2.0 and you won't plan to upgrade in nearest future, you can still use releases from 2.0 branch. Minor fixes and improvements will still be accepted there. Also the site will contain documentation for 2.0 and 2.1 versions.

Try Codeception 2.1 today by installing it via Composer:

composer require "codeception/codeception:*" --dev

or by downloading it as Phar archive

And provide a feedback!

Using Codeception for Symfony Projects

$
0
0

Codeception Testing Framework from its roots was a plugin of symfony 1 framework. Today Codeception is powered by Symfony components and can be used to run functional tests for practically any popular PHP framework.

Why would you someone ever choose Codeception if Symfony already has mature testing infrastructure. Well, here are our reasons. Codeception tests are:

  • fast, as each functional/integration test is wrapped into transaction using Doctrine ORM
  • scenario-driven, it means that tests are linear, described in easy to get PHP DSL
  • can be used for testing complex interactions inside functional tests.
  • easy to write, as Codeception already provides bundled actions and assertions for most popular use cases.
  • combine all testing levels (acceptance, functional, unit) in one tool.

Today we will write how Codeception can be installed into a Symfony project and fit with its structure: we will put functional and unit tests to corresponding bundles, write acceptance tests for complete application, and use one runner to execute them all at once.

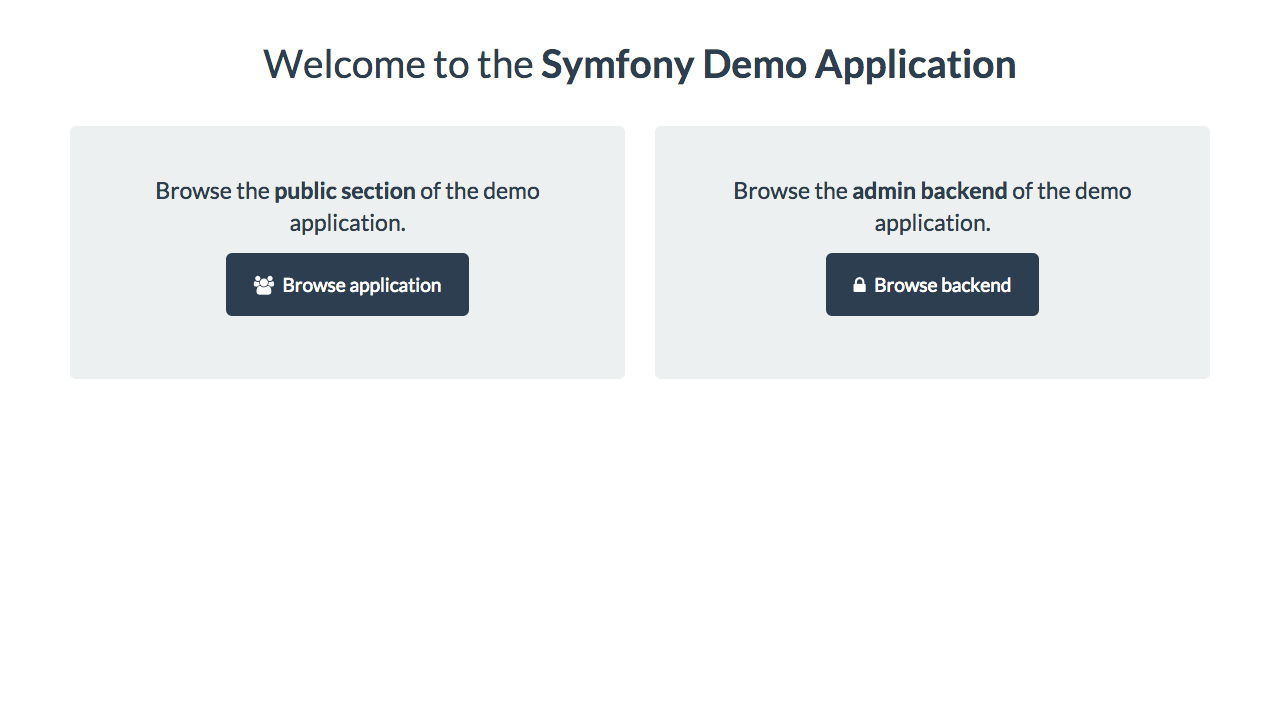
symfony-demo

We will use official symfony-demo application in this example. Once you get it installed you should add Codeception testing framework to dev dependencies list in composer.json:

composer require --dev "codeception/codeception:~2.1"

As you may know Codeception has bootstrap command which create common file structure for acceptance, functional, and unit tests. However, as we decided we will follow Symfony way and skip creating global functional and unit tests. So we start with bootstrapping empty project without predefined suites.

php bin/codecept bootstrap --empty

As you may see, we got new tests directory and codeception.yml file created. Let's have acceptance tests there:

php bin/codecept g:suite acceptance

Acceptance tests are expected to test the site from an end-user's perspective. No matter how many unit tests you have in your projects you can't get without acceptance testing. What if you see a blank page even all unit tests passed. How could this happen? Maybe you rendered wrong template, maybe some scripts or styles were not loaded. Those things can't be handled with internal: unit or functional testing, however with acceptance tests you may be confident that UI is available for customers.

That's why we recommend to have tests with real browser interaction. You can learn more about acceptance testing from our guides.

But what about unit and functional tests? As we decided we will put them into bundles. Symfony-demo has only AppBundle included, so we will create new Codeception setup in src/AppBundle. Take a note that we want those tests to be placed in their own namespace:

php bin/codecept bootstrap --empty -c src/AppBundle --namespace AppBundle

We will also create unit and functional suites there:

php bin/codecept g:suite functional -c src/AppBundle
php bin/codecept g:suite unit -c src/AppBundle

As you noticed we specify path to different Codeception setup with -c or --config option.

Unit tests of Codeception are not quite different from regular PHPUnit tests. You can even copy your old PHPUnit tests to src/AppBundle/tests/unit and have Codeception run them. It is much more interesting to use Codeception to have functional tests replacing ones extending Symfony\Bundle\FrameworkBundle\Test\WebTestCase class.

Let's have a test that will check that there is specific number of posts on a page. Symfony-demo app has the similar test included:

<?php
namespace AppBundle\Tests\Controller;
use Symfony\Bundle\FrameworkBundle\Test\WebTestCase;
use AppBundle\Entity\Post;

class BlogControllerTest extends WebTestCase
{
  public function testIndex()
  {
      $client = static::createClient();
      $crawler = $client->request('GET', '/en/blog/');
      $this->assertCount(
          Post::NUM_ITEMS,
          $crawler->filter('article.post'),
          'The homepage displays the right number of posts.'
      );
  }
}

We will rewrite it in Codeception manner. At first we are generating new empty test case for it. We use scenario-driven test format called Cest:

php bin/codecept g:cest functional BlogCest -c src/AppBundle

And here goes the test:

<?php
namespace AppBundle;
use AppBundle\Entity\Post;

class BlogCest 
{
    public function postsOnIndexPage(FunctionalTester $I)
    {
        $I->amOnPage('/en/blog/');
        $I->seeNumberOfElements('article.post', Post::NUM_ITEMS);
    }
}
?>

As you see, Codeception test is shorter. It is simple, clean, and can be easily extended for more complex interactions. However, we are not ready to run it yet. We need to prepare Codeception to run functional tests inside Symfony context. For this we need to edit src/AppBundle/tests/functional.yml configuration file to enable modules: Symfony2 and Doctrine2 to use:

class_name: FunctionalTester
modules:
    enabled:
        - Symfony2:
            app_path: '../../app'
            var_path: '../../app'
        - Doctrine2:
            depends: Symfony2
        - \AcmeBundle\Helper\Functional

The most important thing here is to provide valid app and var paths for Symfony. Also we are specifying that Doctrine's EntityManager should be taken from Symfony DIC. Let's run functional tests of AppBundle:

php bin/codecept run functional -c src/AppBundle

In this case you will see following output:

Codeception PHP Testing Framework v2.1.2
Powered by PHPUnit 4.8.2 by Sebastian Bergmann and contributors.

AcmeBundle.functional Tests (1) ------------------------
Posts on index page (BlogCest::postsOnIndexPage)     Ok
--------------------------------------------------------


Time: 274 ms, Memory: 36.00Mb

OK (1 test, 1 assertion)

But you can do much more with functional testing. You can insert/assert data with Doctrine by using prepared methods like haveInRepository, seeInRepository of Doctrine2 module. You can perform complex web interactions like filling forms, clicking links, following redirects and much more with methods of Symfony2 module. Those modules are combined together and their methods are available in FunctionalTester class you are supposed to use for writing functional tests. If you are interested to see more complex Codeception tests, we've got them for you.

Btw, you can use Symfony2 and Doctrine2 module for writing your unit and integration tests as well.


But how can we run acceptance tests of a project with tests from AppBundle together? We need to edit codeception.yml configuration file in project root to make it. Let's add those lines there:

include:
    - src/*Bundle

That's it. For now Codeception will include all installations stored in Bundles on run. If you execute:

php bin/codecept run

you will probably see that BlogCest of AppBundle was executed as it was expected to.


tests

The most complex thing in starting using Codeception with Symfony is have it configured. Despite Codeception is auto-connecting to Symfony framework and Doctrine you still have to do some changes to follow Symfony structure. Please take a detailed look into our forked version of symfony-demo project which we configured in the manner we described in this post. Please use similar configuration for all your Symfony projects.

Start using Codeception and discover how complex things can be tested in really simple manner. And once again, even functional and integration tests are really fast, as we start transaction before each test and rollback it afterwards. Write them as many as you need to, do not rely on unit tests only!

P.S. Symfony2 and Doctrine2 module is seeking for an active maintainer. If you work with Symfony and Codeception please contact us to join Codeception team!

On The Threshold of Codeception 2.2: Upcoming Features

$
0
0

Codeception 2.2 is going to land in nearest weeks. We planned to release it much earlier, but as we are not bound to specific date, we decided to work more on improvements and include the most tasty ones in next release. In this and following blogposts we will review the most significant of upcoming features. So take a look what we prepared for you.

We don’t plan any major breaking changes in this release. However, we will remove deprecations, as you may know we display deprecation warnings in output, so this break should be at least predictable.

PHPUnit5 support

Yes, Codeception is finally will unlock it’s dependency on PHPUnit 4.8 so you could receive the latest stable versions of PHPUnit. As you may know PHPUnit 5.x has much better support of PHP7, so anyone who develop using the latest version of PHP should use it. But wait, it’s not the feature of Codeception 2.2 itself! Codeception 2.1.7 will be released with PHPUnit 5.x support as well.

Test Dependencies

Finally @depends annotation works as you might expected it to. The hardest thing about dependencies is that PHPUnit does nothing to organize dependent tests in a right order:

PHPUnit supports the declaration of explicit dependencies between test methods. Such dependencies do not define the order in which the test methods are to be executed but they allow the returning of an instance of the test fixture by a producer and passing it to the dependent consumers.

So their usage in Codeception was useless, especially if you were executing tests in random order with shuffle: true configuration. Some test frameworks, like minitest from Ruby run tests in shuffle by default. On the contrary PHPUnit restricts that, test with @depends annotation must be be executed after the test it relies on. It actually requires you to declare dependent tests in the same file and use the exact order of test execution.

Codeception takes the exact @depends annotation, reorders tests so dependent tests always will executed after the tests they rely on. This will work for Cest and Test formats both. And you can actually declare dependencies for tests in other files. Be sure, they will be taken, executed in the right order, and if a test fails its dependencies will be skipped. This is likely improve acceptance testing. If login test doesn’t pass, you shouldn’t even try to launch all other tests with authorization required.

Here is the annotation format to use to declare dependencies. It should be {fullClassName}:{testName} or {testName} for the test in the same class.

@depends login
@depends UserCest:login
@depends App\Service\UserTest:create

Unlike PHPUnit, you can’t pass data between dependent tests. Alternatively you can use Helpers or Codeception\Util\Fixtures class to store shared data.

Params

This lines are written just in the same time as corresponding pull request is merged:

Codeception 2.2 will allow you to use parameter in configuration files populated from environment variables, yaml configs or .env files. You can use parametrized vars in suite configs, by wrapping them in % placeholder, and adding one or several parameter providers using the params key in global config:

params: [env] # get prameters from environment vars

You can use Symfony-style .yml files, Laravel-style .env, or .ini files to receive params.

This feature would be useful if you want to share database configuration with application and tests. This will especially be useful if you use some sort of credentials passed via environment vars. For instance, if you use cloud testing services, you can set login and password with params and get the real values from environment:

    modules:
       enabled:
          - WebDriver:
             url: http://mysite.com
             host: '%SAUCE_USER%:%SAUCE_KEY%@ondemand.saucelabs.com'
             port: 80
             browser: chrome
             capabilities:
                 platform: 'Windows 10'

Conflicts

This is possibly a breaking feature which was announced in Codeception 2.1 but never worked the way it supposed to be. So let’s talk about it once again. A friendly reminder, if you use config like this:

modules:
    enabled: [PhpBrowser, Laravel5, WebDriver]

you will have problems in Codeception 2.2, if you didn’t have them earlier. Basically the issue here, that those modules provide pretty the same API but different backends for test executions. So it’s hard to tell from config, will this tests be executed as Laravel functional tests, as acceptance tests in real browser, or HTML-scrapper called PhpBrowser. We have lots of issues, when developers misuse those modules, trying to include everything in one config, and we can’t help them besides the good advice to choose one module of one kind.

To avoid this confusion we introduced Conflicts API. Module can declare conflict for modules of the same API, and ConfigurationException will be thrown if you try to use them in group.

But what if you really need to use Laravel5 module along with, let’s say, WebDriver? Don’t worry, partially loaded modules won’t get into conflict. The most common use case is using Laravel ORM methods to create-delete data for acceptance test. In this case you don’t need to load all actions of Laravel5 module but only those related to ORM:

modules:
    enabled:
        - WebDriver:
            url: http://localhost
            browser: firefox
        - Laravel5:
            part: orm

this way you receive haveRecord, seeRecord, grabRecord, have, haveMultiple methods running though Eloquent but amOnPage, see, etc will be executed through WebDriver.

If you were mixing WebDriver with PhpBrowser in order to use REST API inside acceptance tests, you can still have it. Don’t enable PhpBrowser but set it as dependent module for REST:

modules:
    enabled:
        - WebDriver:
            url: http://localhost/
            browser: firefox
        - REST:
            url: http://localhost/api
            depends: PhpBrowser

This way you can use API to create test data for application:

<?php
$I = new AcceptanceTester($scenario);
// let's create a post
$I->sendPOST('/posts', ['title' => 'Hello, Codeception 2.2', 'body' => 'Almost here']);

// check it is actually there
$I->amOnPage('/posts');
$I->see('Hello, Codeception', 'h2');

…and much more to come

Sure, that was not everything what is coming in 2.2! Stay tuned for new cool announcements, which will be posted soon. We will describe new modules, new test formats, and new features! Stay tuned.

Even More Features of Codeception 2.2

$
0
0

Today we continue to show you new features of Codeception 2.2, planned to release this March. In previous post we’ve got you acquainted with Test Dependencies, Params, and Conflicts. This post will continue this overview, and we will start with some nice modules, which might be useful to you.

As you know, in Codeception we try to help developers and testers share their experience by providing set of shared pieces, and not to reinvent the wheel. Modules play exactly that role: you just include modules to fit your project, and write your tests, concentrating on its business logic, and not on implementation. 90% test steps in functional and acceptance tests are covered with out modules. So what do we have prepared for 2.2?

DataFactory

This module should solve problem of generating and populating data for tests. Right now we have Db module, MongoDb with really limited functionality, methods like haveRecord, seeRecord in various frameworks, and Sequence module for generating unique keys for data. However, they didn’t provide any way to generate data needed exactly for a particular test.

DataFactory module should solve this with fixture generators, called factories. The original idea take from popular Ruby gem FactoryGirl and implemented in php in FactoryMuffin library, which we use. Laravel 5 users are already aware of using factories. Now you can use them with all PHP frameworks with ActiveRecord pattern and in Doctrine.

This is how it works. You define rules to generate models:

<?php
use League\FactoryMuffin\Faker\Facade as Faker;

$fm->define(User::class)->setDefinitions([
 'name'   => Faker::name(),
    // generate email
 'email'  => Faker::email(),
 'body'   => Faker::text(),

 // generate a profile and return its Id
 'profile_id' => 'factory|Profile'
 ]);

and DataFactory creates them using underlying ORM, inserts them to database once you call

<?php
$I->have(User::class);

and deletes them after the test. As we said that will work for Doctrine as well, if you are familiar with Nelmio’s Alice, you might find the same idea but with easier syntax to use.

AngularJS

AngularJS is probably the most popular framework for building single page web applications. It provides its own tool for acceptance testing - Protractor but what if you already use Codeception and you are not so passionate to switch to NodeJS? Well if you actually do, please check out our side-project CodeceptJS which brings Codeception concepts to JavaScript world. However, in case of Angular testing there is less reasons to switch, as we brought you Protractor experience in new AngularJS module.

It simply wraps WebDriver module, and adds an asynchronous script between steps to ensure that all client-side operations finished before proceed. This way no new actions are taken before Angular finishes rendering. Also you’ve got new strict locator to use:

<?php
$I->see('davert', ['model' => 'user']);

to match elements by their ng-model.

But enough with modules, we have something more than that!

Examples

In PHPUnit you could have one test to be executed several times with different data, using the data provider mechanism. You can do the same in Codeception inside unit tests. But what about functional and acceptance testing? What if you need to run same scenario but passing different values into it? To be honest, the data provider didn’t looked like an elegant way to define a test data. Data was stored in additional method, often few pages below the original test, so it was hard to see the picture in a whole. We introduce a concept of Example, similar to what you might have seen in BDD frameworks. Using the @example annotation you can define data in test annotation and receive from Codeception\Example instance, injected into test:

<?php
  /**
   * @example(path=".", file="scenario.suite.yml")
   * @example(path=".", file="dummy.suite.yml")
   * @example(path=".", file="unit.suite.yml")
   */
  public function filesExistsAnnotation(FileTester $I, \Codeception\Example $example)
  {
      $I->amInPath($example['path']);
      $I->seeFileFound($example['file']);
  }
?>

For REST API testing this might look like:

<?php
 /**
  * @example ['/api/', 200]
  * @example ['/api/protected', 401]
  * @example ['/api/not-found-url', 404]
  * @example ['/api/faulty', 500]
  */
  public function checkEndpoints(ApiTester $I, \Codeception\Example $example)
  {
    $I->sendGET($example[0]);
    $I->seeResponseCodeIs($example[1]);
  }
?>

Data in @example annotation can be defined using JSON objects, JSON-arrays, or Symfony-style annotation. And yes, examples work only in Cests.

Custom Commands

Long requested feature that finally was implemented by Tobias Matthaiou allows you ro register custom commands to Codeception runner.

If you ever created Symfony Console commands you will be familiar in creating custom commands for Codeception. You migth probably use to have your own template generators, perform data migrations, etc. You can register one as simple as you do it for extension:

extensions:
    commands: [MyApp\MyCustomCommand]

Getting current browser and capabilities in tests

The last one, simple yet useful thing that might improve your acceptance testing experience. If you want to have different behavior of tests for different browsers, you can get current browser name from a $scenario->current value:

<?php
if ($scenario->current('browser') == 'phantomjs') {
  // emulate popups for PhantomJS
  $I->executeScript('window.alert = function(){return true;}'); 
}
?>

in a similar manner you have access to all browser capabilities:

<?php
$capabilities = $scenario->current('capabilities');
if (isset($capabilities['platform'])) {
  if ($capabilities['platform'] == 'Windows') {
    // windows specific hooks
  }
}
?>

That’s all for today, but not for Codeception 2.2 The most important and most impressive feature is waiting for you in next post. Subscribe to our Twitter to not miss it. Stay tuned!

Codeception 2.2 Beta

$
0
0

Happy Easter, everyone! Ok, not actually everyone, but Happy Easter to those who celebrate it this weekend. If you do (or even not), you probably will have free time to play with something new. And yes, by something we mean a beta version of Codeception 2.2!

We already announced lots of changes in Codeception:

but we forgot the most important one. It is Gherkin Support, which allows you to combine business requirements with functional testing. Yes, *.feature files are now part of a family with Cest, Cept and Tests. Codeception is a tool for running all kind of tests and in this release we significantly improved test internal architecture and test formats.

But back to Gherkin.

Feature: ToDo items
  In order to get my tasks done
  As a motivated person
  I need to be able to organize my todo list

  Scenario: show current todos
    Given there are todo items:
      | Task             | State   |
      | make Gherkin PR  | opened  |
      | update docs      | opened  |
      | create examples  | closed  |
    When I open my todos
    Then I should see 2 todo items

Complete Guide on BDD with Codeception is not ready yest, but you can start with generating first feature file:

codecept g:feature <suiteName> <featureName>

We recommend to have a special features folder in acceptance or functional suite, so it could be symlinked to the features dir in root of your project. This way non-technical users can esaily access feature files, without need to examine actual tests.

Next thing to do is to describe feature with scenarios. When you are done, prepare scenario steps for implementation be running

codecept gherkin:snippets <suiteName>

You will get a list of methods which should be included into your actor class (let’s say AcceptanceTester). Then you should have it implemented. In theory, you can use any method of any class annotated with @Given, @When, @Then to be the step definition. So don’t worry you will end up with everything to put in one context, you will have option to use multiple contexts depending on role, tags, etc. More about it in BDD guide coming in next weeks.

For those of you, who set your dependencies as “codeception/codecepton:*” and (with no settings of "minimum-stability": "stable" you will probably have some wonderful time once you get back from holidays. This release is minor, so it doesn’t break everything, but we has breaking changes. We notified of breaking changes in earlier versions by “deprecation warnings”, and we actually removed lots of deprecated stuff. The most important breaking change is proper implementation of Conflicts API. Please make sure you are not using modules of the same kinds in your configs.


Codeception 2.2-beta is available for installation only via Composer:

composer require --dev "codeception/codeception:2.2.0-beta"

Next steps to do:

Stable release will come in next week(s). The release date depends on reported issues and on progress of updating documentation.

Have nice weekends and testing time! We, Codeception team, hope you will love our product.

P.S. Reported issues should include a version. Pull Requests should be sent to master branch.

Codeception 2.2 is here

$
0
0

Today we are glad to announce that Codeception 2.2 is finally released. The first beta came in March and after there were 2 RC versions. We assume that everyone could already try the new branch and check its new sweet features like Gherkin support, Examples and others. We hope that you will like new version as it brings true multi format support to your testing experience! What other tool can execute Gherkin features and PHPUnit tests? We already support 4 testing formats for code and scenario testing and it is quite easy to introduce more.

Despite its growth and feature richness Codeception is still the most simple tool for test automation. We updated documentation to keep up to date with latest changes and improved the learning experiences. Also we prepared some Case Study pages which will help you to setup Codeception for your application. Now it is easier to start with Laravel and Symfony apps.

If you have questions about Codeception you can ask them on our community forum which is PhpTestClub. We plan to build a sustainable community, so If you use Codeception for a long please share your experience there, help others to get into the world of PHP testing.

How To Upgrade

We encourage you to UPGRADE to 2.2. Please take a look into changes marked as breaking.

  • The most important change is introduction of module conflicts. If modules share the same interface they probably should not be used together except the cases when the modules are loaded partially. This way you can’t use Laravel5 module with WebDriver but you can use Laravel5 with part: ORM so only ORM actions to be loaded. This change is important in order to avoid confusion in your functional or acceptance tests. If you use 2 similar modules you can’t be sure which one is executed when you call $I->amOnPage. Learn more from previous blogpost.
  • Please also note that Dbh and Laravel4 module were removed from core package and moved into separate packages.
  • Codeception\TestCase was replaced with Codeception\TestInterface to it is a good idea to replace its usages in your Helper files.
  • Cept and Cest formats are no longer extend PHPUnit_Framework_TestCase, so they don’t have expectException, getMock, etc.

Please read changelog to learn more.

But wait, you may ask, why there are breaking changes in minor release? Does Codeception follow semver? Not right now but future releases will do. Next major version is going to be Codeception 3.0 which sure will introduce breaking changes for good reason. Also we plan to decouple most of modules from core package to make faster release cycles for them. Codeception 2.2 is also marked as minor that its still support PHP 5.4. However, we encourage you to upgrade for future versions.

New Features Described


If you are using 2.1 and you won’t plan to upgrade in nearest future, you can still use releases from 2.2 branch. Minor fixes and improvements will still be accepted there. Also the site will contain documentation for 2.2 and 2.2 versions.

Try Codeception 2.2 today by installing it via Composer:

composer require "codeception/codeception: ~2.2" --dev

Writing Better Tests: Expectation vs Implementation

$
0
0

What makes a meaningful test? This question should always be asked. No matter we write your tests first or tests after, they may stay in a project for years and it is pretty important them to test the things that really matters. Badly written tests can slow us down by constantly failing on each implementation change, and such tests can be written no matter you follow TDD or not. The idea of a test is to ensure that software works and not to freeze it at specific point.

Such situation happens when a test is bound to implementation details. We are choosing to rely on parts which we may consider to be stable but they are not. Whenever we come to unit testing and we are writing a mock we should understand that we change the reality, and how that artificial reality will survive the test of time. Consider using such test written in XIX century as an example:

Given I am drunk 
And I am in a pub
And I want to get home
When I order a cab
Then I expect to see 2 horses and carriage
And they bring me home

By ordering a cab nowadays you probably won’t expect to see 2 horses but you probably will get home even faster. In XXI century we still have pubs and we still need cabs to get home, that’s something stable in our world. The point is: you should not be worried of HOW you will be brought home: by horses, by car, by flying dragons or by teleport. That’s implementation details.

But how to understand what is stable and what is not? We need to use interfaces. Not that one which is written as interface keyword in PHP but a general term: User Interface, API. And that’s what makes unit testing and browser testing similar: we always need to rely on public interfaces for a test. If break this rule and we start to test private methods or raw values in database we are producing a synthetic tests which will lead us the very tricky path.

An opposite to follow public APIs is to depend on implementation.

But back to software development. Here is an example of magento generators written in PhpSpec. Not saying it is bad or not, but we use it to illustrate the point.

<?php
class ModuleSpec extends ObjectBehavior
{
  function let(\Symfony\Component\Filesystem\Filesystem $filesystem)
  {
      $this->beConstructedWith($filesystem);
  }

  function it_should_create_a_folder_given_a_valid_path($filesystem)
  {
      $path = 'app/code/test/test';
      $filesystem->exists($path)->willReturn(false);
      $filesystem->mkdir($path, 0700)->willReturn(true);
      $this->make($path)->shouldReturn(true);
  }
}

The test is very descriptive: there is a class that depends on Filesystem and can be used to create a given folder. However, one line is questionable:

$filesystem->mkdir($path, 0700)->willReturn(true);

This is the mock that expects mkdir to be called with a specific parameters and to return an expected result. But is that stable to changes? What if at some point mkdir gets deprecated in favor of mkdirPlus, what if a method signature changes?

Well, in this current case we can be sure that this method won’t be changed. The reason is simple: it’s Symfony, it’s LTS, and its API is stable. But can you say that about internal classes of your application? That they are 100% documented and they won’t change their behavior in future.

When we change the implementation of Module->make() it still fits expected specification (‘it should create a folder given a valid path’), but the test fails. This happens because the test pretend to know too much. In similar manner a strict master doesn’t just ask apprentice to do the job. He thinks he knows better how to do it and provides him with a detailed instructions. He doesn’t care of the outcome but apprentice should understand the basics: disobedience will be prosecuted.

But what if the actual result is not important to us? What if we want to ensure that tested method took the right path. That what happens in a test above: the implementation is verified. Indeed, If you are master (senior developer) and you have an apprentice (junior), this works pretty well: you ask them to implement the method just the way you see it.

This makes a difference between testing behavior or testing result. Probably in most cases you want to test the real outcome, a result, but in some important areas you may need to test the behavior as well.

To test a result we should rely on public interfaces only. We can validate class only by calling public method of this class and its collaborators In this case we need to call $filesystem->exists('app/code/test/test'), and make a class with in-memory filesystem. We can even make this class without using any mocking framework, just with anonymous classes.

By making a test bound to implementation we are copying parts of that implementation into a test. This breaks the DRY principle. At some point test and code can be unsynchronized and this leads to fragility. If you change class, the test using a mock of that class may still pass, but actual code using it will fail, and this false positiveness is dangerous.

Overusing mocks also makes tests longer. Lines of test code you write doesn’t always convert to software quality. Actually, from the software developer experience the true is quite the contrary: the more code you write the more bugs you may introduce. And your tests are just the same as production code: they will evolve with your software and they needs to be maintained.

So the actionable advice here is to think what is important to you: a behavior or a result (no matter how it is achieved). Try to discover what is stable and what is not, rely on stable parts, and use public interfaces. Thanks for reading.

Written by Michael Bodnarchuk @davert.

Thanks to Nick Palamarchuk for the review and ideas.


Writing Better Tests: Obtaining Specification

$
0
0

When you start implement testing in your development process you should always ask: which tests are important for this project. And there is no general answer to this question. “Test everything, everywhere” is not a good solution as well, by writing more and more lines of code you won’t stable software. Tests should be driven by specification, and specification comes from your business. Depending on that you should choose which areas are more important to cover with tests and which are less.

Part 1: Expectation vs Implementation

It is always thought that you should have several acceptance tests, a dozen of functional, and a lot of unit or integration tests. However, If you develop a media portal it is more important to you, and for your business to have a good-looking UI. Same story if you develop new To-Do application focused on perfect UX. It is not much business logic for a To-Do app, but you need to ensure that everything user sees is slick. Even you have some internal bugs it is more important to you to assure that all buttons are visible, they can be easily clicked and so on.

Like in this app:

That’s right for this type of applications you should revert your testing pyramid. You should have lots of acceptance tests and few unit/integration.

If UI/UX is a part of your business, concentrate on acceptance (browser) tests. But if you run banking application, ecommerce solution, ERP or CRM, UI is not that important. Those applications include complex domain logic and internal quality is much more important than visual part.

What if user by a bug creates 3 extra todos in To-Do app? Well, it doesn’t look nice but not a big deal. But what if user by a bug withdraws from ATM 3 times more money they own? That’s a real problem. In case, you deal with money or real things it is critically important to test all the business processes. Test all possible scenarios, all edge cases, make the domain to be 100% covered with tests.

That brings us to key idea of this post. There are two kinds of IT products:

  • software that automates business
  • software that is a business by itself

And depending on the kind of software you work on you have different priorities. This also answers a question: “do I need BDD for my project”. In case, you are automating traditional business, you need to translate all business processes into a code, and you need ubiquitous languages for that. In case, you are building a new business, a startup, you probably don’t need that layer of complexity as presumably founders already speak the IT language.

So learn what is important in your business. What brings you money. What are the risks. Cover that part at first and think from business side and not from technical. This is how a business would understand the real value of automated tests.

Written by Michael Bodnarchuk

We provide consulting services on Codeception and automated testing in general.

New Addons Page

$
0
0

As you know Codeception has a really nice ecosystem with lots of modules and extensions built by the community. Thanks for everyone who invest their time into building better testing tools. Sometimes we accept 3rd-party modules into Codeception core, sometimes we ask contributors to publish them as standalone packages.

Today we’d love to announce a minor but very nice change on our website. We updated the Addons page so community-built modules and extensions would look nice there. The new Addons page looks as slick as a marketplace but everything there is for free!

If you have a helper or an extension that might be useful to others, don’t hesitate to share it! New “cards” format for extensions and modules will make them more visible to others. You can also attach your pictures and set colors for cards to be even more visible (If you think your extensions worth it).

The philosophy of Codeception is: don’t reinvent the wheel, share testing solutions. Spend more time writing tests and not test support code. Get more powerful tools and make testing fun!

There are some tools you definitely should not miss:

and many many others! If you don’t have a module or extension but you still have some experience to share, write a few lines to the Cookbook.

Thamks for reading. Stay tuned for next cool updates!

Codeception 2.3

$
0
0

Today the Codeception 2.3 sees the world. This is a stable release with almost no breaking changes but with new features you will probably like.

At first, we need to say “thank you” to Luis Montealegre for bringing PHPUnit 6.0 support to Codeception. This is done by using class aliases so this doesn’t break old PHPUnit versions, so as usual, Codeception can be used with PHPUnit 4.8 and higher. However, If you run PHP7+ and you experience PHPUnit issues in this release we recommend you to set phpunit/phpunit package to ^5.7.0 in your composer.json.

Supporting 3 major versions of PHPUnit may have its issues, so in next release, which is going to be 3.0 we will probably drop support for old PHPUnits and PHP < 7.

Ok, let’s talk about other changes in this release!

Installation Templates

Codeception is a wide-range testing framework and sometimes it is hard to get it configured for a specific case. Nevertheless, you need only acceptance testing Codeception will still install all 3 test suites for you. In 2.3 we prepared installation templates: customized setup wizards that can configure tests for your needs.

To setup Codeception for acceptance testing with browser only you can run this command

codecept init acceptance

After answering a few questions, you will be able to execute first browser test

The setup wizard will prepare only acceptance test suite with tests located in tests directory. Suite configuration will be stored in codeception.yml.

For QA engineers codecept init acceptance is a new convenient way to start end-to-end testing in PHP.

We also included API and Unit templates for faster setup of REST API or unit tests:

codecept init api
codecept init unit

But the best thing about installation templates that they can be created by anyone! They can be placed inside a separate package and loaded by init command. A template class should be placed into Codeception\Template namespace and then it can be autoloaded. Installation templates are pretty simple, learn how to build your own by taking a look at Acceptance template as an example.

Configuration Improvements

Suites Inside Main Config

Suites can be defined inside main config:

actor_suffix: Tester
paths:
    tests: .
    log: _output
    data: _data
    support: _support
suites:
    unit:
        path: .
        actor: UnitTester
        modules:
            enabled:
                - Asserts

A good option if you have a single suite.

Suite Paths

The suite can have its custom path (specified by path). From config above expects unit tests to be placed into the root directory, where codeception.yml is located (path: tests: . and path: `)

selection_201

Suites With No Actor

Suite can be defined without an actor, which is useful for unit testing

paths:
    tests: tests
    log: tests/_output
    data: tests/_data
    support: tests/_support
    envs: tests/_envs
suites:
    unit:
        path: .
        modules:
            enabled:
                - Asserts

In this case, UnitTester won’t be created, as well as _generated/UnitActions. However, such suites won’t be able to have Cest and Cept files generated.

Naming Changes

class_name suite in suite config replaced with actor:

class_name: UnitTester => actor: UnitTester

actor from global config is replaced with actor_suffix config option (which makes more sense).

All these changes are backward compatible, so old values in config will work.

Extensions

Dynamical loading of extensions was already with --override option but was not very usable. Now extensions can be loaded with --ext option:

codecept run --ext Recorder

or by providing a full class name

codecept run --ext "Codeception\Extension\Recorder"

This can be used to enable a custom reporter. For this reason, the new DotReporter has been added:

codecept run --ext DotReporter

selection_205

Db Populator

From the early days of Codeception we had the Db module which was trying to do its best to populate database and clean up it between tests. However, parsing all possible SQL dialects and running them through PHP was not very effective. What if you could use native Database tools to import data instead of doing it from PHP? Why not!

In Codeception 2.3 we recommend to specify a command to load a database in populator option of Db module:

 modules:
    enabled:
       - Db:
          dsn: 'mysql:host=localhost;dbname=testdb'
          user: 'root'
          password: ''
          cleanup: true # run populator before each test
          populate: true # run populator before all test
          populator: 'mysql -u $user $dbname < tests/_data/dump.sql'

This approach is system-dependent, you can’t use the same config on Windows and Nix systems, but is much faster. Thanks Mauro Asprea @brutuscat for this feature.

Db module defaults

Important notice: we changed defaults for Db module, so cleanup and populate options are disabled by default. They were quite dangerous in use, so we decided that you need to set them explicitly in Db module config.


Codeception 2.2.12 has been released as well. See complete changelog for all notable changes.


P.S. Codeception is seeking for Symfony module maintainer. If you use Codeception with Symfony and you’d like to improve it, please contact us at team@codeception.com. Maintainer responsibilities are: review issues, pull requests, update symfony demo app and so on. Take a part in project development and make open source brighter!

Drive your Browser Tests with Codeception

$
0
0

In last few weeks Codeception received updates aimed to empower acceptance testing. We try to make PHP a better place for browser tests. As you know, QA engineers often prefer other languages like Java or Python for test automation. But PHP is not that bad by itself, it is simpler, it is faster in most cases, it has great IDEs. And for sure, we have Codeception. With it you can write the most complex acceptance tests in a simple scenario-driven manner.

So what was added in the last release?

RunProcess

RunProcess extension was introduced. Use it to easily start/stop Selenium Server, ChromeDriver, or other required services for a test suite.

Enable it in suite config or in environment:

# acceptance.suite.yml
extensions:
    enabled:
        - Codeception\Extension\RunProcess:
            - php -S 127.0.0.1:8000
            - java -jar selenium-server.jar

# or inside environment config
# in this case, run tests as
#
# codecept run --env selenium
env:
  selenium:
    extensions:
        enabled:
            - Codeception\Extension\RunProcess:
                - php -S 127.0.0.1:8000
                - java -jar selenium-server.jar           

Depending on the environment (dev host, CI server) you can easily switch setups if you use environment configs.

SmartWaits

This is the new unique feature of Codeception which incorporates implicit waits. By itself, the implicit wait was available in Codeception with wait: option in WebDriver config. However, it was not usable, because by design it slowed down test execution. In this release, we introduce the SmartWait concept. Implicit waits are used only when they are really needed and disabled for all other cases. This makes tests extremely stable and fast.

Thus, a test won’t fail if expected element didn’t yet appear on a page but waits for it a few seconds more. Just set wait: 5 to WebDriver config to try it and read the documentation.

Customization

Codeception took to much of browser control. Let give it back to you. With start: false option you can disable autostart browser before a test, and create a browser session manually. Codeception doesn’t provide actions to start browser session inside a test (because it is supposed you already have one in a test), but you can write a custom method in a helper:

<?php
// support/Helper/Acceptance.php:
// 
public function startBrowser()
{
    $this->getModule('WebDriver')->_initializeSession();
}

public function changeBrowser($browserName)
{
    $this->getModule('WebDriver')->_restart(['browser' => $browser]);
}

public function closeBrowser()
{
    $this->getModule('WebDriver')->_closeSession();
}

Then these methods can be used inside a test.

<?php
// I prepare something for a test
$I->startBrowser();
// I do something inside a browser
$I->closeBrowser();

If you use BrowserStack you can use this features to set a test name dynamically to capabilities. Here is how can you do it in Acceptance Helper:

<?php
// inside Helper\Acceptance
// 
public function _before(TestInterface $test)
{
    $webDriver = $this->getModule('WebDriver');
    $name = $test->getMetadata()->getName();
    $webDriver->_capabilities(function($currentCapabilities) use ($name) {
        $currentCapabilities['name'] = $name;
        return new DesiredCapabilities($currentCapabilities);
    });    
    $webDriver->_initializeSession();
}

Please don’t forget to set start: false in config option, so browser wouldn’t be started twice!

@prepare

What if you need to change the configuration for a specific test? Let’s say you want to run all tests in Firefox but this specific one in Chrome? Or something like that.

We added new annotation @prepare which can be used in Cest and Test formats. It will execute a method which can change the configuration before the module is called.

<?php
/**
 * @prepare switchToFirefox
 */
public function testSomethingInFirefox(AcceptanceTester $I)
{
    $I->amOnPage('/');
    $I->click('Detect Browser');
    $I->see('Firefox');
}

protected function switchToFirefox(\Codeception\Module\WebDriver $webDriver)
{
    $webDriver->_reconfigure(['browser' => 'firefox']);
}

This @prepare can be used not only for browser tests but everywhere. Use it wisely!


Is that all? Almost.

We also updated WebDriver docs to include more options for Local Testing, like ChromeDriver. We also published a reference on running Chrome in Headless mode.

Update to the latest 2.3.4 version to try all the new features.

We worked hard to bring all this stuff to you. Now is your turn: please help to spread the word and encourage more of your colleagues to use PHP and Codeception for web testing. Setting up Codeception for web tests nowadays is as simple as running:

codecept init acceptance

Happy testing!

Writing Better Tests: Riding The Command Bus

$
0
0

Before writing any line of test code we should think of how meaningful this test would be. The best code is the code you never write, you know. So if you ever begin to think of which parts of the application you should cover with tests.

Let’s start with a heart of your application, the Business Logic.

Layered Architecture

Depending on architecture Business logic could be in Controller (ough), in Model (ough-ough), or in a special Service layer, which is the most preferred way. Business Logic responsible for taking decisions: which entities are valid and which are not, who can create entities, what happens when the entity is stored. Service layer should delegate the database operations to the infrastructure level.

Infrastructure level is purely technical. It just takes orders from Service layer and executes them. It doesn’t make any decisions on its own. In most cases, ORM should be at the infrastructure level.

While models or repositories do not contain any decision making logic it is not that important what ORM type to use: ActiveRecord or DataMapper.

CommandBus and Domain Events

One of the solution to separate business logic from everything would be the CommandBus architecture.

CommandBus is well-known in PHP community. Learn more about it from

If the application implements CommandBus pattern it is easy to find the business logic. It is located in command handlers. So let’s test them!

Testing CommandHandler

CommandHandler takes a command, calls the infrastructure services, and sends the domain events. In theory, CommandHandlers can be tested in isolation, with unit tests. Infrastructure services can be mocked and domain events can be caught. However, those tests may have a little sense. And here is why/

“Trust me, I will save this to database” - may say the test with mocked infrastructure. But there is no trust to it. To make the command handler reliable and reusable we need to ensure it does what it is expected to do.

Also, mocks comes with their price. While integration test is really similar to the actual business code, unit test is bloated with mock definitions. It will get hard to maintain and support it really soon:

<?php
// is that a business logic test?
// but no business inside of it
$eventDispatcher = $this->createMock(EventDispatcher::class);
$busDispatcher = $this->getMockBuilder(BusDispatcher::class)
   ->setMethods(['dispatch'])
   ->getMock();

$busDispatcher->expects($this->exactly(2))
   ->method('dispatch')
   ->withConsecutive(
       [$this->isInstanceOf(CreateAccount::class)],
       [$this->isInstanceOf(CreateCompany::class)]
   );

$handler = new RegisterUserHandler($eventDispatcher, $busDispatcher);
// ... 

Here we also mix implementation with a specification, which is a pure sin. What if dispatch method will be renamed? What if we fire more than 2 commands in a call? How is this related to business?

Even you can mock services you shouldn’t always do it.

In most cases, business logic should be tested with an integration test. Because the database is an essential part of your application. You can’t deliver an app without a database. The same way you can’t make sure domain logic works as expected when nothing is stored in the database.

Testing Flarum Forum

As an example let’s pick Flarum project which is a forum built on top of Illuminate components (Laravel) and Symfony Components. What is most important that it has the Commands and CommandHandlers. By looking at one directory we can learn what Flarum does. That’s awesome!

Looks like the #1 priority is to get all those Command Handlers tested. We can use StartDiscussionHandler to start.

For integration tests, we need to initialize Application with its Dependency Injection Container. Then, we fetch StartDiscussionHandler out of it:

<?php
protected function _before()
{
    // initialize Flarum app
    $server = new \Flarum\Forum\Server(codecept_root_dir());
    $app = $server->getApp();
    // get StartDiscussionHandler from container
    $this->handler = $app->make(StartDiscussionHandler::class);
}

When the handler is prepared we can write the first basic test:

<?php
public function testAdminCanStartADiscussion()
{
    // ARRANGE: create command object with all required params
    $admin = User::find(1); // User #1 is admin
    $command = new StartDiscussion($admin, [ // create command
        'attributes' => [
            'title' => 'How about some tests?',
            'content' => 'We discuss testing in this thread'
        ]
    ], '127.0.0.1');
    // ACT: proceed with handler
    $discussion = $this->handler->handle($command);
    // ASSERT: check response
    $this->assertNotNull($discussion);
    $this->assertEquals('How about some tests?', $discussion->title);
}

How do you like this test? This test so tiny and so easy to read. Sure, we should add more assertions to find out that all the business rules are applied, but for now it’s ok to try the very basic scenario. Maintaining and extending this test will be a pleasure.

A bit of Stubs and Mocks

Integration test represents a part of a system, a working component. Once it triggers the outer service, it should be mocked. In layered architecture, a class from a layer should have access to its neighbors, and to classes of lower levels. So in our case, CommandHandler of business logic can access other command handlers but should be banned from accessing other services or other command buses.

For sure, mailers, queues, and other asynchronous services should be replaced with stubs.

Conclusion

Your application has a heart. Don’t make it die from a heart attack. Write tests. Write meaningful stable tests that will last.

Written by Michael Bodnarchuk

We provide consulting services and trainings on Codeception and automated testing in general.

Viewing all 321 articles
Browse latest View live


Latest Images